Better Than Takeout Sweet and Sour Chicken
Recipe at a Glance
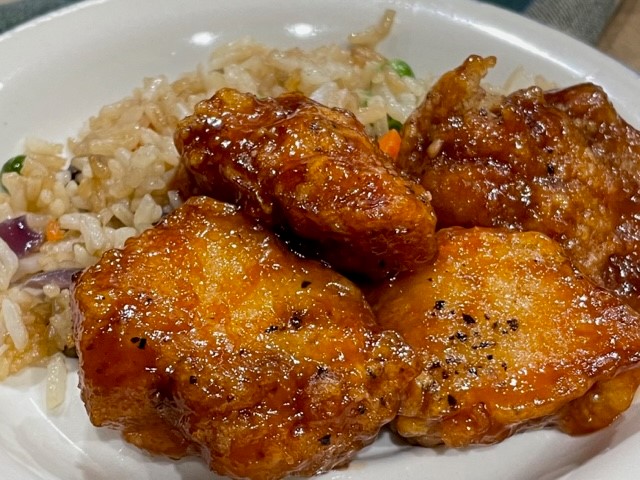
- What it is: Crispy chicken pieces coated in a homemade sweet and sour sauce and baked until sticky and flavorful.
- Best chicken to use: Boneless chicken thighs or chicken breasts both work.
- Cooking method: The chicken is lightly fried first, then baked with the sauce.
- Sauce flavor: Sweet, tangy, sticky, and savory with ketchup, vinegar, soy sauce, hoisin sauce, garlic, and sugar.
- Best served with: White rice, fried rice, noodles, steamed broccoli, or stir-fried vegetables.
- Make-ahead tip: Prep the sauce and cut the chicken ahead of time, then coat, fry, and bake when ready.
- Leftovers: Store in the refrigerator for up to 3 days and reheat in the oven or skillet for the best texture.
This sweet and sour chicken is everything you love about takeout. Crispy edges, sticky sweet sauce, and tender bites of chicken, but made right in your own kitchen. It’s a family favorite here, and honestly? Once you try it, you’ll think twice about ordering takeout. Bonus: no deep fryer required.
If you love easy chicken dinners, you might also like my Farmhouse Alice Springs Chicken or Street Corn Chicken Bowls.
This post may contain affiliate links, which means I may earn a small commission at no extra cost to you. As an Amazon Associate, I earn from qualifying purchases.
Why You’ll Love This Sweet and Sour Chicken
This sweet and sour chicken gives you that takeout-style flavor at home with simple ingredients and a homemade sauce.
- Crispy golden chicken pieces without using a deep fryer.
- Sticky, sweet, and tangy homemade sauce.
- Works with chicken breasts or boneless chicken thighs.
- Family-friendly and perfect with a simple bowl of rice.
- Great for a takeout-at-home dinner night.
The chicken is coated in cornstarch and egg, quickly browned in a skillet, then baked with the sauce until everything turns glossy, sticky, and flavorful.
Ingredients for Sweet and Sour Chicken
- Boneless chicken thighs or breasts
- Cornstarch
- Eggs
- Sugar
- Ketchup
- Apple cider vinegar
- Hoisin sauce
- Soy sauce
- Garlic
How to make Sweet and Sour Chicken
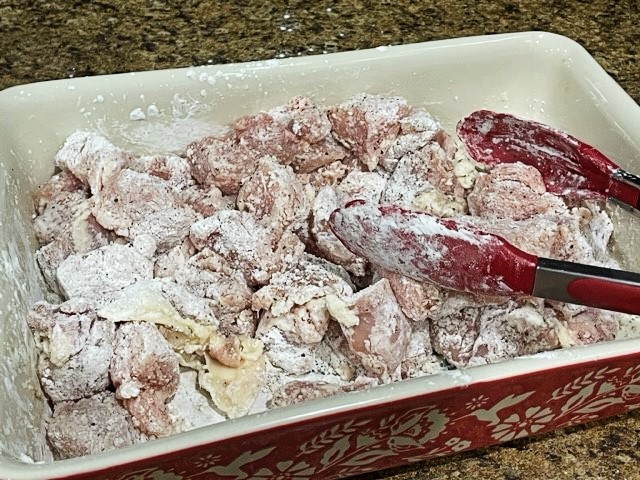
Cut the chicken into bite-sized pieces and season it with salt and pepper. Add the cornstarch to a shallow dish, then toss the chicken pieces until they are coated on all sides.
Whisk the eggs in a separate bowl. Dip the cornstarch-coated chicken into the egg, letting the excess drip off before frying.
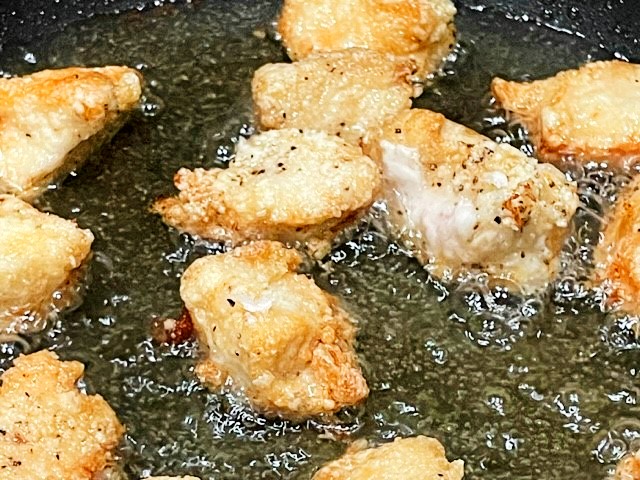
Heat about ¼ inch of vegetable oil in a large skillet over medium heat. Brown the chicken in batches for 1 to 2 minutes per side, just until golden. The chicken does not need to be cooked all the way through because it will finish baking in the oven.
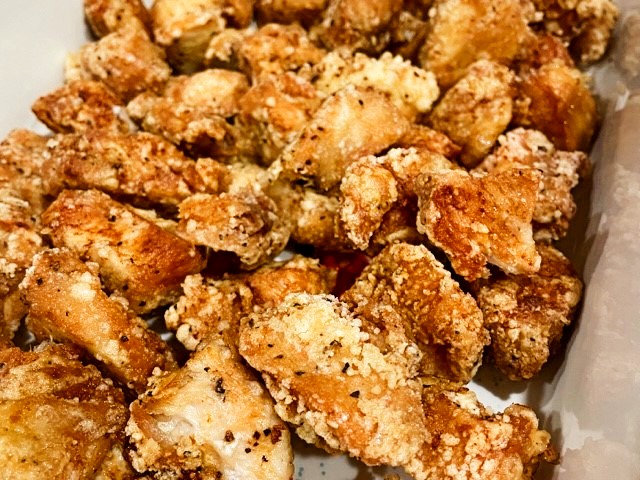
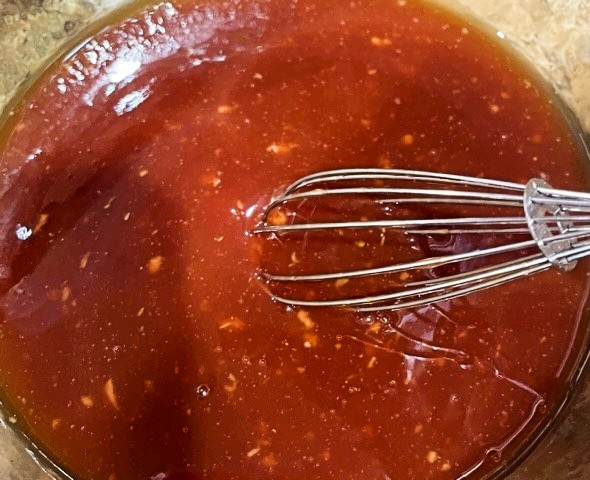
Transfer the browned chicken to a greased 9×13-inch baking dish and spread it into an even layer. In a small bowl, whisk together the sugar, ketchup, apple cider vinegar, hoisin sauce, soy sauce, and garlic.
Pour the sauce over the chicken and gently toss to coat. Bake uncovered at 325°F for 1 hour, stirring every 15 to 20 minutes, until the sauce is thick, sticky, and coating the chicken.
Helpful Tools for This Recipe
You do not need special equipment to make sweet and sour chicken at home, but a few basic kitchen tools make the process easier. A large skillet works well for browning the chicken in batches, while mixing bowls are helpful for coating the chicken and stirring together the sauce. A whisk, tongs, baking dish, and rice cooker are also handy for making this takeout-style dinner simple from start to finish.
Why Do You Fry the Chicken Before Baking?
Frying the chicken before baking gives the outside a light golden coating and helps the sauce cling to each piece. The chicken does not need to be fully cooked in the skillet because it finishes baking in the oven with the sauce.
The quick fry adds texture, while the baking time lets the homemade sweet and sour sauce thicken and soak into the chicken. That combination gives you crispy edges, tender chicken, and a sticky sauce without needing a deep fryer.
Tips for Crispy Chicken and Tangy Sauce
- Use cornstarch and egg to get that light, crisp coating without deep frying.
- Cook chicken in batches so it browns and not steams.
- The sauce thickens fast, so keep the pan moving and don’t walk away.
- Want more tang? Add a splash of rice vinegar or pineapple juice.
What to Serve with Sweet and Sour Chicken
We usually serve this sweet and sour chicken over white rice, but it would also be good with my Garlic Butter Rice with Kale if you want something a little more flavorful on the side.
For a simple dinner spread, serve it with a cold side like Creamy Pasta Salad or Old-Fashioned Creamy Coleslaw.
Storage & Reheating
- Store leftovers in an airtight container in the fridge for up to 3 days.
- Reheat in a skillet or oven to crisp it back up. A microwave works too but may soften the coating.
More Easy Dinner Recipes
- Farmhouse Alice Springs Chicken
- Street Corn Chicken Bowls
- Oven-Roasted Rotisserie-Style Chicken
- Creamy Chicken Spinach Pasta Bake
- Garlic Butter Rice with Kale
Sweet and Sour Chicken FAQ
Can I make this ahead of time? You can prep the chicken and sauce separately, then combine when ready to eat.
Can I use frozen chicken? Yep! Just thaw and pat dry before coating. Too much moisture will prevent it from crisping up.
Can I use any kind of vinegar? You can use apple cider vinegar, white vinegar or rice vinegar.
Better Than Takeout Sweet and Sour Chicken
Ingredients
Method
- Preheat the oven to 325°F. Lightly grease a 9×13-inch baking dish and set it aside.
- Cut the chicken into bite-sized pieces, about 1 to 1½ inches. Season the chicken with salt and pepper.
- Add the cornstarch to a shallow bowl or dish. Add the chicken pieces and toss until each piece is well coated.
- In a separate bowl, whisk the eggs until smooth.
- Working with a few pieces at a time, dip the cornstarch-coated chicken into the beaten eggs, letting any excess drip off.
- Heat about ¼ inch of vegetable oil in a large skillet over medium heat. When the oil is hot, add the chicken in batches, being careful not to crowd the pan.
- Brown the chicken for 1 to 2 minutes per side, just until golden. The chicken does not need to be fully cooked at this point because it will finish baking in the oven.
- Transfer the browned chicken pieces to the prepared baking dish and spread them into an even layer.
- In a small bowl, whisk together the sugar, ketchup, apple cider vinegar, hoisin sauce, soy sauce, and crushed garlic until combined.
- Pour the sauce evenly over the chicken. Gently toss or stir so the chicken is coated in the sauce.
- Bake uncovered for 1 hour, stirring every 15 to 20 minutes so the sauce coats the chicken and thickens evenly.
- Serve hot over rice.
Notes
- Chicken breasts or boneless chicken thighs both work for this recipe. Thighs stay extra tender, while breasts give a leaner result.
- Fry the chicken in batches so the pieces brown instead of steaming in the skillet.
- The chicken does not need to be fully cooked during the frying step. It will finish cooking in the oven with the sauce.
- For a tangier sauce, add an extra splash of vinegar. For a sweeter sauce, add a little more sugar or ketchup.
- Store leftovers in an airtight container in the refrigerator for up to 3 days.
- For the best texture, reheat leftovers in a skillet or oven. The microwave works, but the coating will be softer.