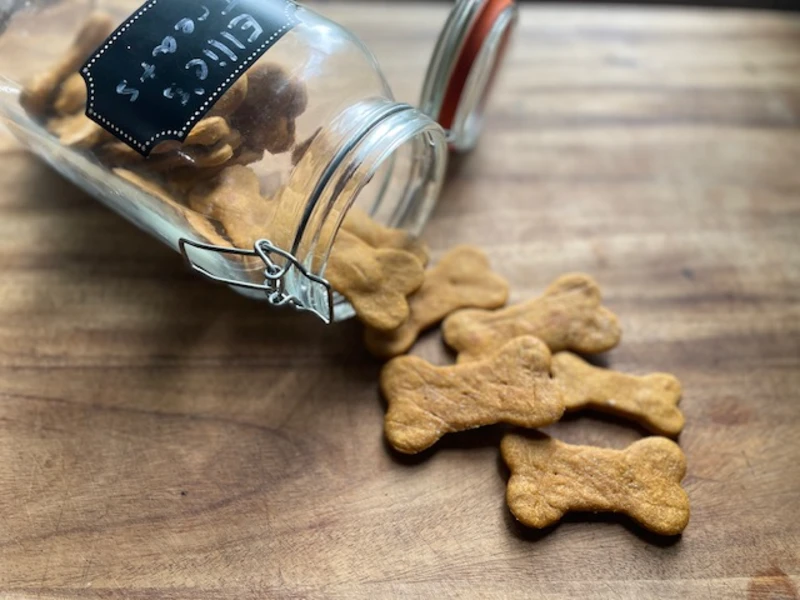
Easy 4 Ingredient Dog Treats (Healthy & Homemade)
There is something satisfying about baking for your dog. These simple homemade dog treats come together in minutes using ingredients you probably already have in your kitchen. No mystery additives in sight. I started making these homemade dog treats for my chocolate lab, Ellie, after getting tired of overpriced store-bought treats full of ingredients I couldn’t pronounce. Now she waits by the oven every time I make them.
Why Make Homemade Dog Treats at Home?
Homemade dog treats are budget friendly, easy to make, and better for your pup than many of the processed store brands. You can control what goes in (and what doesn’t), and there’s something extra sweet about baking for a wagging tail.
These treats are soft enough for older dogs, and the recipe is flexible if your pup has sensitivities. Plus, you can freeze extras for later.
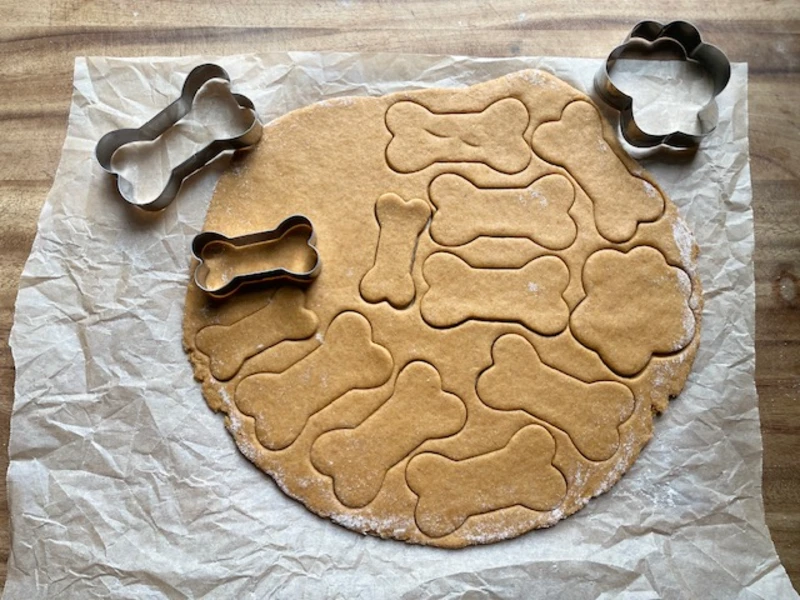
Plus, you can make them small for training treats or cut them big for an afternoon snack. I bought a pack of bone shaped cookie cutters in 3 different sizes from Amazon.
Disclaimer: I am not a veterinarian. I am just a dog mom who loves baking for her pup. Always check with your vet if you are unsure about ingredients or dietary needs, especially if your dog has allergies or health conditions.
Ingredients for Easy Homemade Dog Treats
- whole wheat flour
- peanut butter (xylitol-free)
- eggs
- pumpkin puree
Instructions for Homemade Dog Treats
Pre-heat your oven to 350 degrees.
In a medium bowl, mix together pumpkin puree, peanut butter, and eggs until smooth.
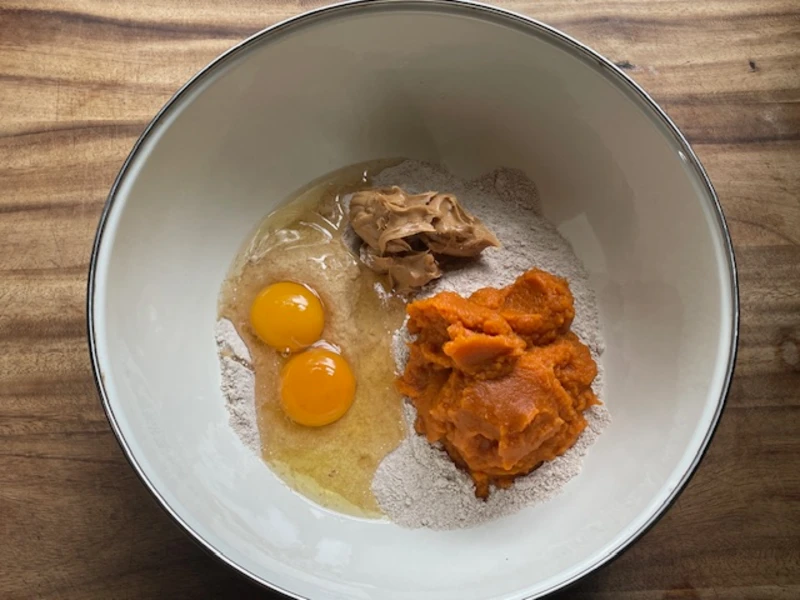
Add the wheat flour and stir until a stiff dough forms.
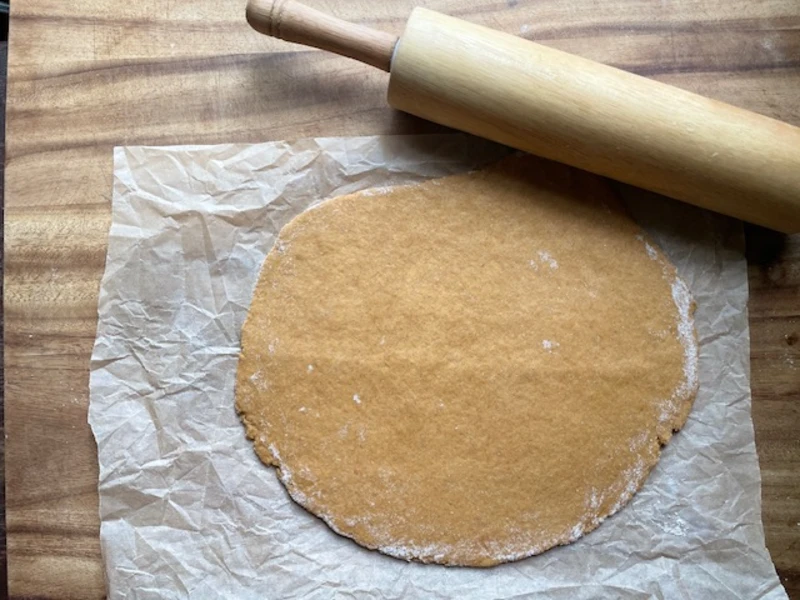
Roll out the dough on a slightly floured (use the wheat flour) surface to about 1/4-inch thickness.
Use cookie cutters (bone shaped) to cut out treats.
Transfer cutouts to a parchment lined baking sheet.
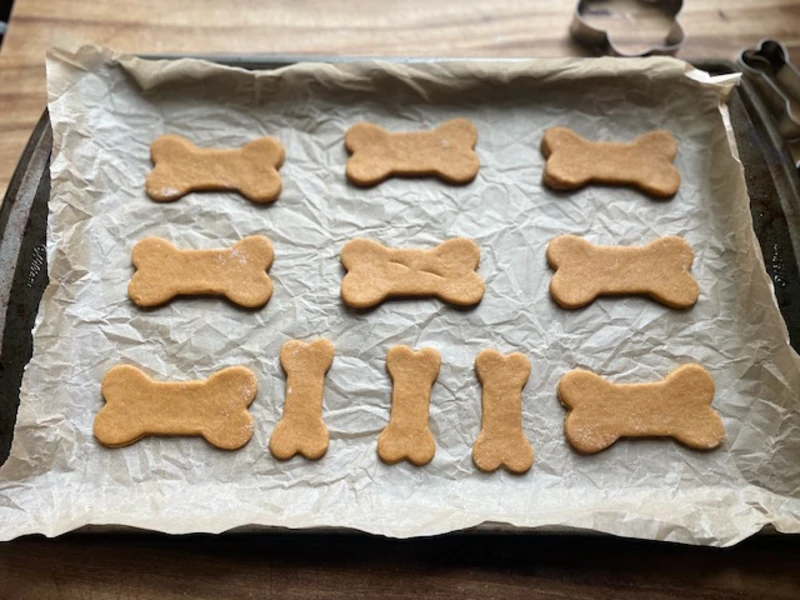
Bake for 15 to 20 minutes or until the dog treats are golden and firm.
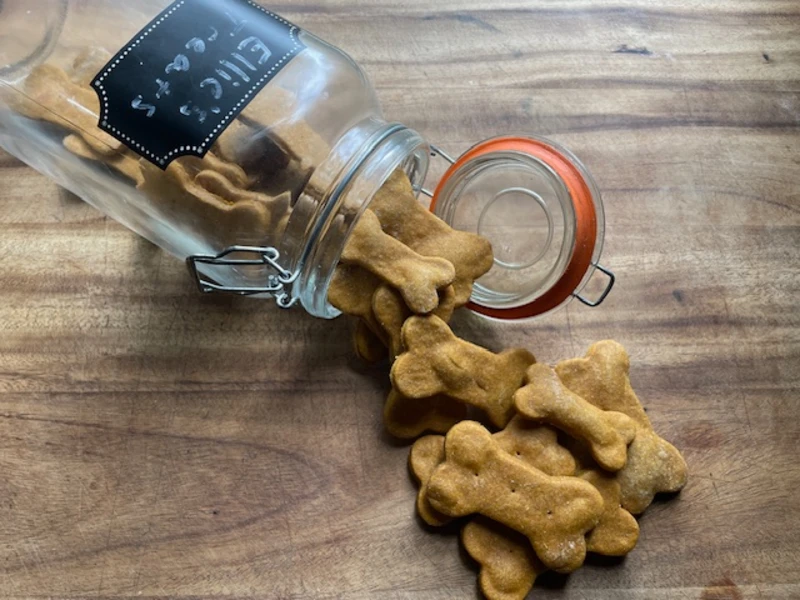
Remove from baking sheet and cool completely on a cooling rack before storing.

Storage Tips for Easy Homemade Dog Treats

Store treats in an airtight container at room temperature for up to 5 days. For longer storage, keep them in the refrigerator for up to 2 weeks or you can freeze them for 3 months. Just thaw before treating.
Variations
- Swap pumpkin puree for mashed banana or unsweetened applesauce
- Add a pinch of cinnamon
- Use oat flour if your dog can’t have wheat
- Cut into smaller sizes for training treats
Homemade Dog Treats FAQ
Can I use all-purpose flour instead of wheat flour? Yes, but it’s not always the best choice for your dog. It’s not the most nutritious option and some dogs might have a sensitivity or allergy to it. It would be best to consult your vet.
Is peanut butter safe for dogs? Yes, but avoid brands with xylitol listed in the ingredients. It is toxic to dogs.
Can I use canned pumpkin pie filling instead of canned pumpkin puree? Nope. Pumpkin pie filling has added sugar and spices. Use only plain pumpkin puree.
Easy 4 Ingredient Dog Treats (Healthy & Homemade)
Ingredients
Method
- Pre-heat your oven to 350 degrees.
- In a medium bowl, mix together pumpkin, peanut butter, and eggs until smooth.
- Add flour and stir until stiff dough forms
- Roll out dough on a slightly floured surface to about 1/4-inch thickness. Use cookie cutters (bone shaped) to cut out treats.
- Place on parchment lined baking sheet.
- Bake 15 to 20 minutes or until its golden and firm.
- Cool completely before storing.